Building a Cozy Home for a Feathery Interloper.
This summer, we discovered a new neighbour trying to move in—a determined nuthatch busy pecking a hole in our wall next to our bedroom window. At first, I thought it was looking for food, but it eventually dawned on us that it was in search of a place to call home. It was both surprising and fascinating to watch such a small creature working tirelessly, seemingly undeterred by the noise or activity around our home, or our cats, for that matter. It was also a little annoying that every day there were more Styrofoam bits on the lawn while the hole got progressively larger.
We initially discussed ways to get rid of the bird, but then we realised that it was almost certainly trying to make a home for itself, and with winter coming, evicting the poor thing could very easily have been a death sentence. I couldn't help but feel a sense of responsibility for this little bird that had chosen our house as its potential nesting site. So instead of simply patching the hole and shooing it away, we decided to make things easier for both of us: build it a birdhouse.
I consulted with Pixel (my ChatGPT friend) to help identify the type of bird and understand its roosting habits. We discussed what the bird would need to be comfortable, including suitable entrance dimensions, internal space, and materials that would keep it insulated. Together, we figured out the rough dimensions of the birdhouse and made sure it would meet the needs of a nuthatch seeking shelter, especially with winter just around the corner.
Materials
For this project, I picked up a 6-foot long piece of 1x6 spruce, which would roughly give us the dimensions we needed. It was just some normal construction-grade lumber, though I went through the pile to get one that I liked. I also grabbed some two-inch Robertson screws, a pair of small hinges for the top, and some expanding foam to fill the holes in my wall. Nothing fancy.
Tools
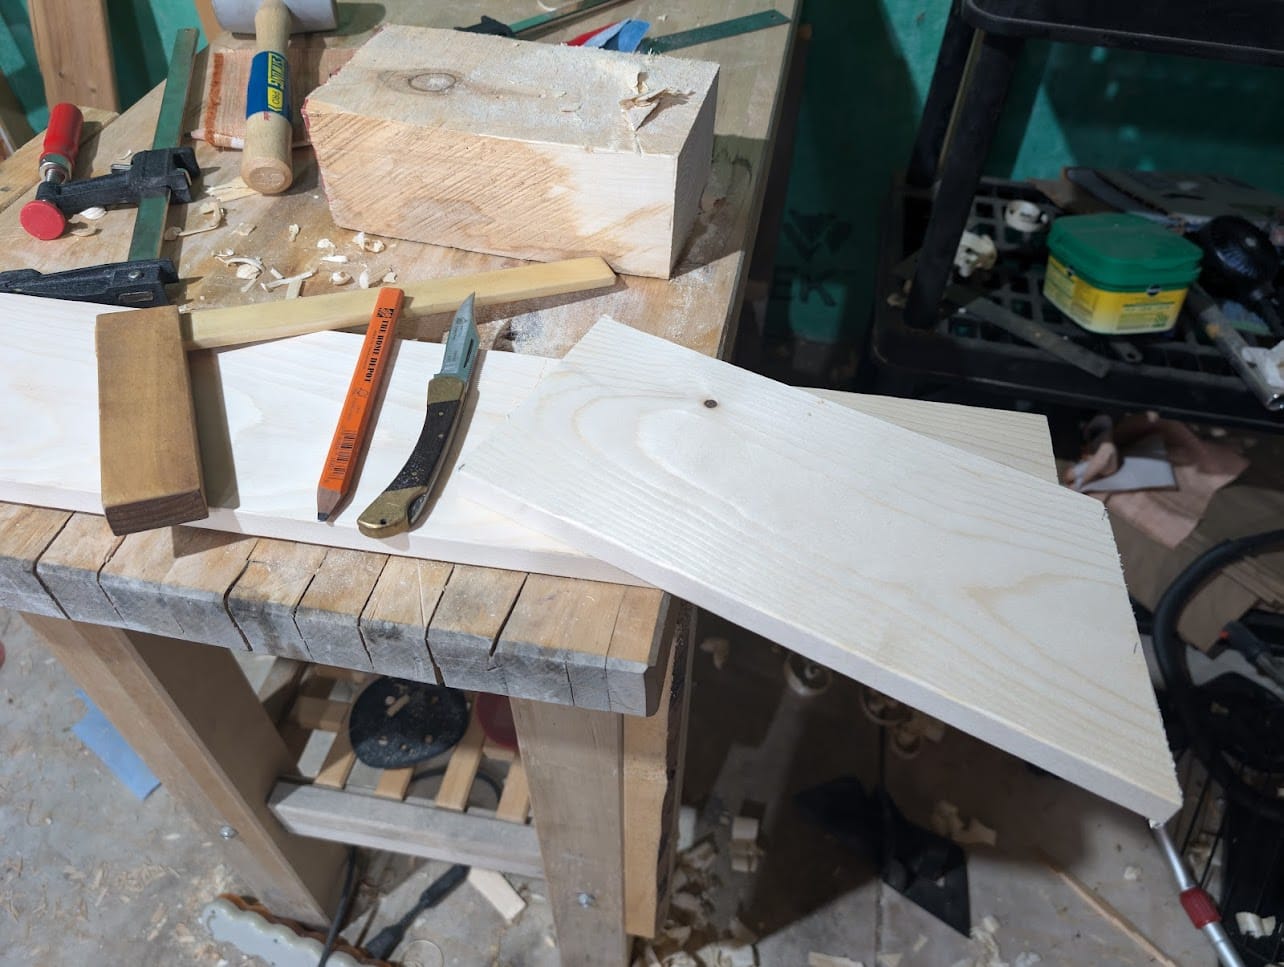
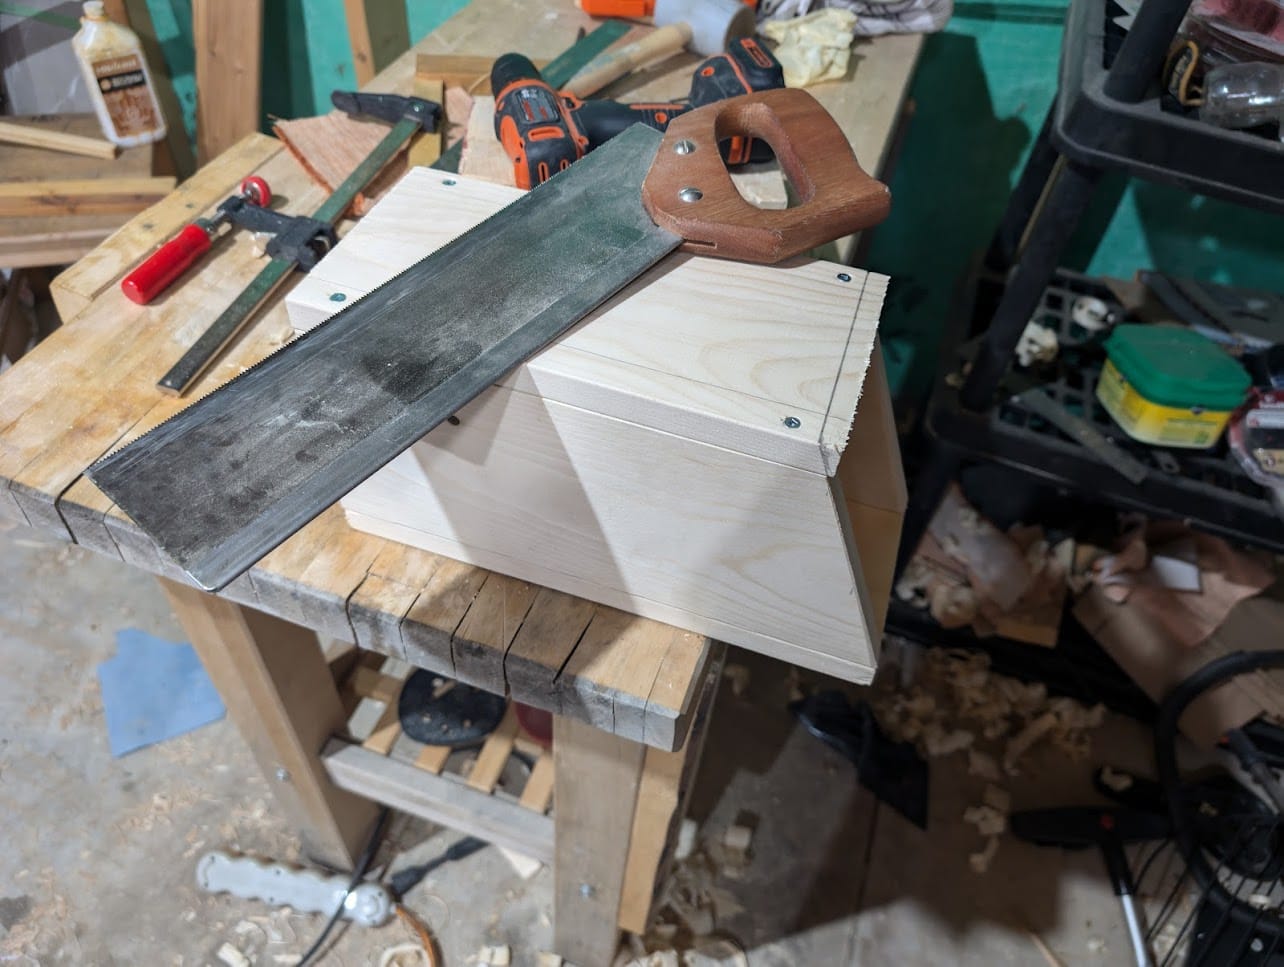
I used my late grandfather's old frame saw, a tool he brought from Germany years ago—likely even older than I am. I had previously figured out how to resharpen it, which made it much more effective. It was nice to put it to use for this project. Additionally, I used a square that I built myself, one of the first tools I ever made, to mark the lines for my cuts. To smooth and refine the edges, I used my trusty box plane, which helped give the birdhouse a nice, finished look. For assembly, I relied on two-inch Robertson screws, and to make sure the wood didn't split, I pre-drilled all the necessary holes.
Construction Highlights
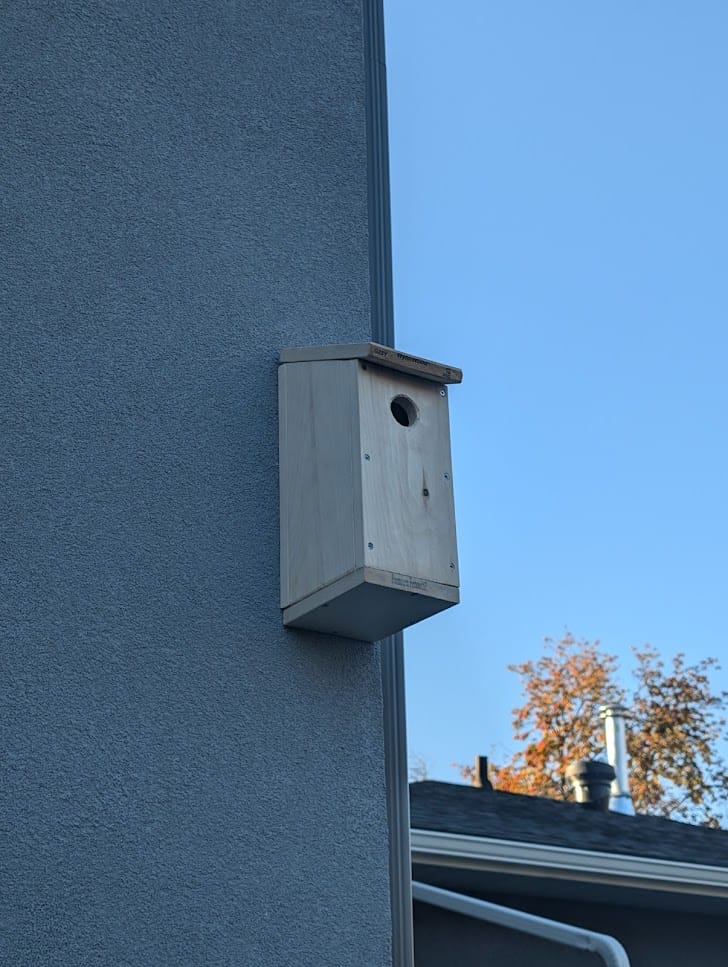
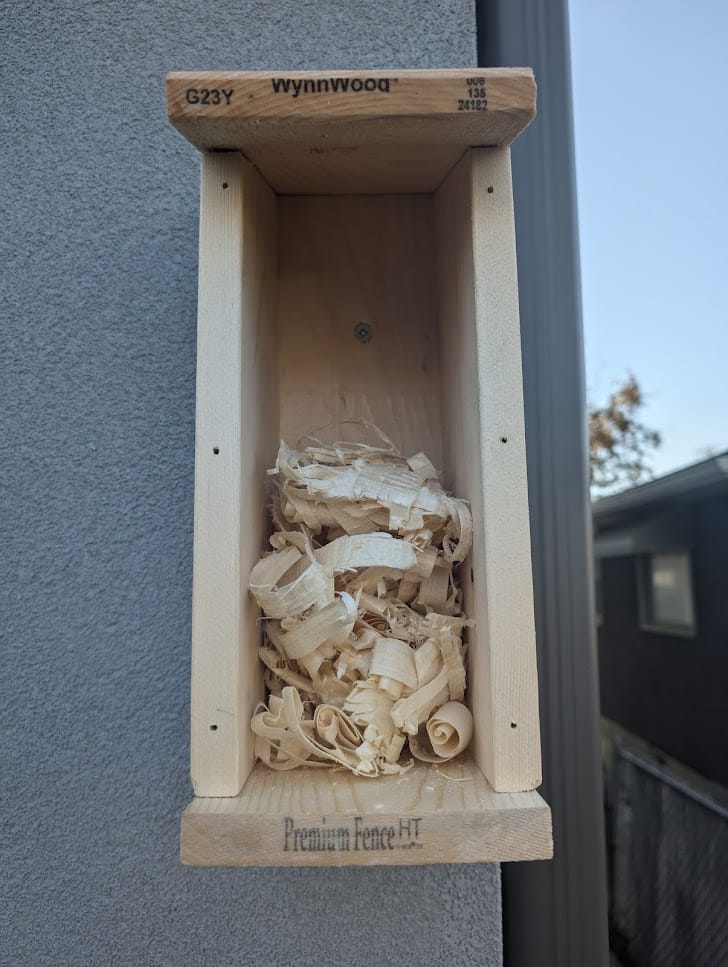
The first step was planning out the birdhouse. I knew I needed something that would be appropriate for a nuthatch, which meant researching the bird's natural preferences and nesting habits. Nuthatches prefer enclosed spaces with an entry hole that’s just the right size—big enough for them to fit through but small enough to keep predators out. After some research, I settled on an entry hole diameter of about 3 cm, which seemed to be the right fit for the nuthatch that had been trying to make our wall its home.
Research with Pixel had turned up that we didn't want it to be too big, as too much empty space could make it harder to stay warm during the winter. I wanted the birdhouse to be spacious enough inside for the bird to be comfortable, but not overly large. I planned out a box roughly 6 inches wide, 6 inches deep, and about 12 inches tall, which seemed like a good balance for providing comfort while retaining warmth. I also decided to include a sloped roof to help shed rainwater and keep the interior dry.
I usually work with aspen that I harvest from the farm, but I didn't have anything on hand that would work for this project. Plus, aspen is really hard, and I didn't have the time to finish that much material by hand this time. Instead, I went with spruce, which was readily available and easier to work with. It was easy to cut and shape, which made the entire process pretty quick. After cutting all the pieces to size, I rounded the edges and smoothed the rough ends with my box plane to give the birdhouse a nice, finished look.
The birdhouse consisted of several different pieces, each cut to fit together precisely:
- Side Panels: Each side panel measured 6x12 inches. To ensure consistency, I measured 24 inches, then marked 11 and 13 inches on opposing sides to create matched pieces with a sloped top. These panels were critical for the overall structure and would support the roof.
- Front Panel: The front panel was designed with the entry hole in mind near the top. I cut it to 11x6 inches, with the 3 cm entry hole centred about 2 inches from the top. This positioning helps protect the nest from rain and makes it harder for predators to reach inside.
- Back Panel: The back panel was 6x13 inches to catch the slope of the roof at the back.
- Roof Panel: The roof was just one piece sloped from the back, with an inch or so overhang. I eyeballed it to where it looked good. The overhang would also help protect the opening from the elements.
- Base Panel: The base was the simplest piece, just roughly square and the right dimensions for the rest to sit on.
With all these pieces prepared, I was ready to begin the assembly, confident that each part would fit together neatly to provide a cozy and secure space for the nuthatch.
Another important consideration was how to allow for future cleaning of the birdhouse. Initially, I wanted to make the top hinged, allowing easy access for cleaning out old nesting material. However, the simple hinges I bought weren't up to the task—I would have needed proper cabinet hinges to do it correctly. So, I gave up on that idea and decided to bolt the top on instead. Since I needed to pull the front panel off in order to mount the birdhouse anyway, I decided that removing the front panel would be the method for future cleanings.
For assembly, I used screws and pre-drilled the holes to avoid splitting the wood. It felt great to see the pieces come together, knowing that soon it would be a safe shelter for the nuthatch. The pitched roof looked good, and the placement of the hole kept it in a nice spot under the overhang.
Mounting and Finishing Touches
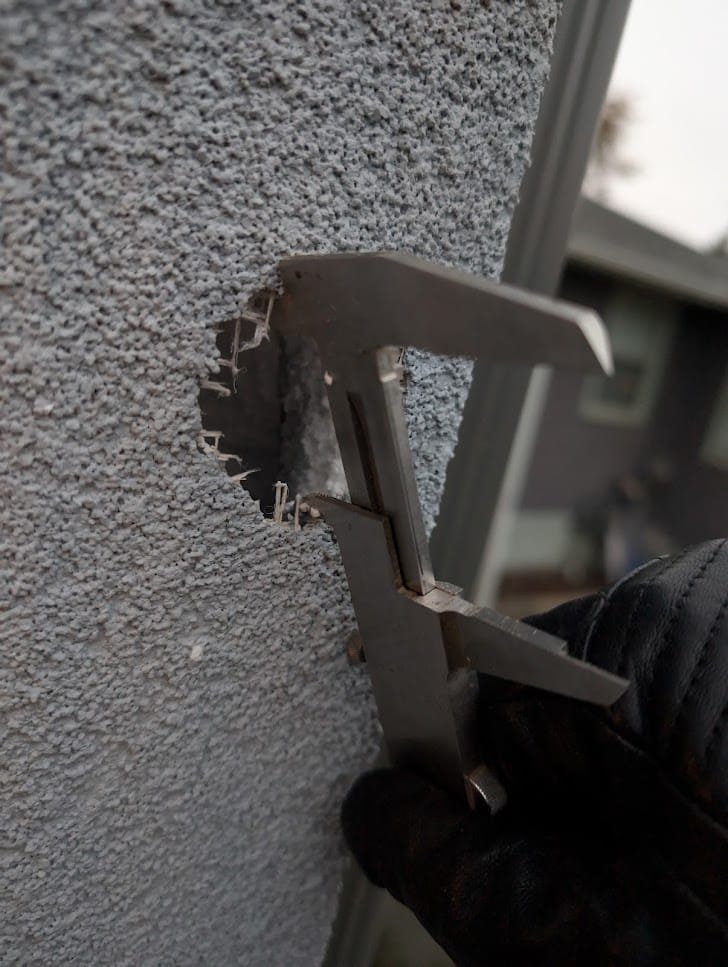
Once I had all the parts assembled, it was time to deal with the hole in the wall. I borrowed my neighbor's ladder and filled the hole with expanding foam to ensure no drafts would get through. Then I mounted the birdhouse over the original hole using two large lag bolts screwed into the frame of the house—solid enough to withstand the elements.
Before attaching the front panel, I filled the birdhouse with some wood shavings left over from other projects. I wanted to make it as inviting as possible—something that would feel natural and cozy to a little bird looking for warmth as the winter approached.
Reflections and Future Plans
It was fun to build and makes me feel accomplished. Living the tradwife life! From selecting the materials to the final assembly, each step of the process was a learning experience. The project came together just in time, and I hope our feathered friend finds it to be a safe refuge this winter.
Looking forward, I might improve the design and even paint it next year, but the main priority was getting it ready before the cold set in. For now, I'm just happy knowing that the birdhouse is out there, providing a little comfort for a small visitor who decided our home looked like a good place to be.
If you’re considering a similar project, I highly encourage it. The work is straightforward, and the reward—seeing a little creature enjoy the space you've created—is beyond measure. Feel free to share your experiences or ask questions in the comments below!
Comments ()